Showing posts with label 2014. Show all posts

Sunday, 11 May 2014

Costco Shopping and Prices 11/05/14


Just a selection of goodies priced today- let me know with a comment if you want the price of anything pictured but not in the list. Some items I didn't know what to compare them to, others I have listed before.

Sunday, 27 April 2014

Costco Shopping and Prices 27/4/14

So I have continued to shop at Costco even though I haven't been posting anything about it. I usually go now for smaller trips and park outside the building and just take my own shopping bags in. The experience is much easier and shorter when you don't have to get a car park or a trolley! But today I bought quite a few things, mostly things I don't think I have posted about before either, so I have done another price comparison between Costco, Aldi and Woolies. I get my Woolies prices online, so the savings in store wouldn't be as large I think. However you will see that on these products the difference is so large between Woolies and Costco that even the lower in store prices won't be better than Costco.  If you want more details or a review of any particular items please let me know with a comment, I'd be happy to let you know :)
Items I didn't mention in the table: Yum Cha at Home Steam Selection seafood dumplings (scallop, prawn and prawn+ginger) So much yum. This is $19.99 for 52 piecces. Frozen Blueberries 6.46 for 1kg, Ceasar Salad- The lettuce is ok, the bacon is ok....but the dressing is sooooooooooo good. This is a much better shopping treat than the jerky I usually by too, I think. In this picture you also can't see the skim milk box, that blue one is full cream. 

Pre-vacuuming
After Vacuuming- Enough to last a day or two fresh
and the rest sealed up to last until we need it. I
will need to keep track this time of how long it takes
us to use it up and how nice it stays.


So even though the spell check was on, I missed a couple of 'real' spelling errors. But I couldn't be bothered fixing it and getting a new screen shot. I am truly sorry for letting you down. But not really.

Friday, 25 April 2014

Essence Gel Nails at Home Review

I have exceeded my own expectations of laziness today, but it has resulted in me being able to review the new nail products I showed from last nights Priceline visit.
The products I was looking at were the gel top coat, the gel primer, the french tip stickers and a metallic polish for stamping.

Gel Top Coat
I think this cost around $4.60, but it isn't listed on the website.
On my tester nails I did one with the two coats of IBD gel white on the tip first, then used the Gelish Tafeta colour over it, followed by the Essence top coat. On the other nail I have 2 coats of Tafeta, then two coats of the IBD on the tip, follwed by the Gelish top coat.
The reason for the different processes was because I also wanted to see if it looked better with the colour on top or under the white, and how well the tip stickers worked over a coat of gel polish. Because these are just practice nails I didn't bother with base coat at all.  In the photos the nail with the bigger white tip has the Gelish top coat.


Overall I think the Essence gel is kind of a dud. It does work, but not nearly as well or as easily as the Gelish. You can see in the images that the Essence top coat give a cloudy effect to the nail and is a much more dull finished compared to the Gelish. It was also very thick and I found it was hard to spread over the nail without being a very thick layer. It is also has a slightly yellowish tint to it which I think is what made it seem a bit cloudy. If you want to try out gels, I don't think this is the way to do. I would really recommend bypassing the 'drug store' type ones and go straight for CND Shellac or Nail Harmony Gelish polishes and base/top coats. They are much easier to work with and will give you better results for your investment to start with. Then it is easy to experiment with other polishes in the middle as you get better at application. I have yet to find a cheaper brand that applies as much like regular polish as the Gelish or CND Shellac ones, and have not found other brand top coats to give as good of a shine.  

Gel Primer
This is the product that you use on your nails before applying the base coat. The aim is to dehydrate the nail and ensure there are no oils that might make your polish lift sooner. It cost $4.60, for comparison I think the mini Gelish ones like in the picture cost about $8 at Hairhouse.
Comparing the ingredients to the Gelish brand one, I found that the main ingredient was the same (a type of alcohol) but the rest seemed different, however they could have been different names for the same chemical for all I know about it. I'm not sure how much effect this will make on my nails, as I was only playing with practise nails today. 
On the back of my hand I found they felt the same and both evaporated quickly, with the Gelish seeming like it was a bit faster. The Essence one however smells really nice and the smell lingers on your skin for ages, which is nice because the Gelish one smells awful. I would really like it if the smell stayed on may hand after applying all the layers of polish, it would just make the process a bit nicer and fancier feeling! So far I would recommend this, I will update if suddenly my polishes stop working as well. 
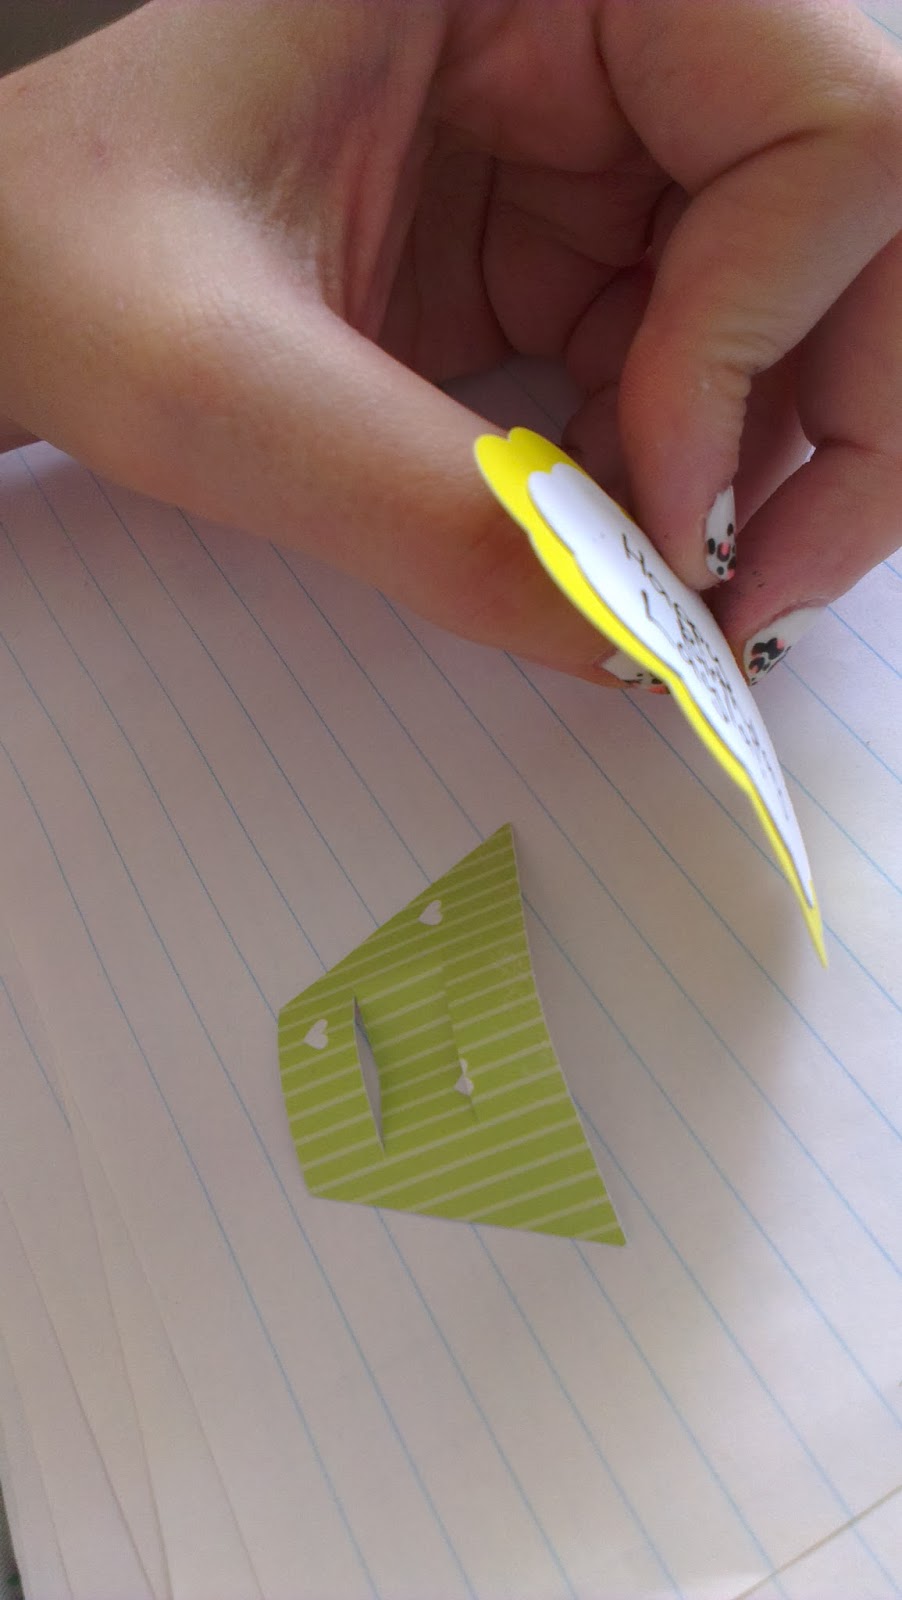
French Tip Stickers
At $1.80 for 30 you can't go too far wrong with these. I tried them two ways. First stuck straight onto my practise nail and then stuck on over my base colour that had been cured and dry brushed to try and remove some of the sticky layer. 
Straight on, as it would be on a natural nail when using regular nail polish or over totally dry nail polish, this will work really well and give a great crisp even line for a french tip, or other effect depending on where you place it. 
One layer before cleaning up
Two layers, cleaned up

Over gel polish, like any tape produce, it doesn't work as well and slips around a bit. That said, I think it will make tipped looks much easier for me because using these I can mark the height better so it is even across my nails. Using this to apply the first coat, then cleaning up with a brush dipped in alcohol or non acetone remover before curing means I can get neat even tips, and the second coat of colour is easy to just carefully apply over the top. I am also able to apply thinner layers this way which should mean it lasts longer as thick application at the tips often leads to lifting. 

Metallic Polish
This polish I think was about $3, so it is a bargain either way!
For stamping I found it worked pretty well, not as well as my Ulta3 gold polish, but they aren't completely the same colour. It will still be very useful and great for a warmer toned but softer look when stamping gold. 
I stamped over my practise nail, but you couldn't see it well due to the colours so I ended up just stamping over some purple paper to compare the different polishes I have that are similar. I would say that this Essence polish is now my second best one, and still better than the expensive Konad Special Stamping polish that I got with my inital set. The stamp I used is from BundleMonster.
This was the best shot I could get of the Essence colour. It turned out really well. 

Compared to the others without flash, you can see the Ulta3 gold next to it is just a bit stronger and more opaque.

Compared to the others with flash. The Konad gold is very dissapointing. It does stamp well, as all the Konad colour will, but it isn't a rich metallic gold. It just kind of looks brown/ dirty yellow and has no shine or sparkle.

So there you go! 1 dud, 2 really good and one pretty useful. Not too bad and given the prices, I'm not annoyed that the top coat isn't great. It will be useful for smoothing out glitters I think, and for playing with pigments etc. when I don't want to contaminate my good top coat. 

I would love to do more nail posts and would really like ideas for nail art looks or products to try out, so feel free to comment and let me know what you think :)

(little) Priceline Haul

You know how it is, you go in for one specific thing and come out with lots of random stuff....
I originally went in for the Sanctuary cleansing oil, $19.99, (because Youtube told me cleansing oils are where it's at), but wandered past the Essence stand and saw they have a gel polish system, so I HAD to try tthe topcoat (I can't find this on their website, but I think it was $4.60).

They also had a nice looking metallic that I thought might be good for stamping, which is also not on the website, but I think it was around $3.

I wanted to give the french tip guides, $1.80, a go with my gels and pigments to see if I can get a nice look.

The last Essence product I got was the  gel primer, $4.60. I have used the Gelish primer since I got my first kit about 3 or 4 years ago, so clearly these things last a while. It's great to have found something so easily accessed as Priceline though! Hopefully I can do a review of these nail products, as gel systems can be very expensive and sometimes hard to get.

 The last thing I got was a Maybelline Baby Lips lip balm, $3.16 on special. I got the "Smoothing Cherry" flavour...but I really just picked it because I liked the colours.

Thursday, 23 January 2014

Cupcake Pencil Toppers with Downloads!

I've organised myself enough that this will be the first year I actually properly acknowledge the kids birthdays. I have always had the class sing the song etc, but I have never had anything to give them in the way of a card or special stickers like some teachers have.
I saw these pencil toppers on Pinterest, however the link didn't go anywhere which was a bit annoying.
I used the Scan n Cut online software to make the templates for the top and bottom of the cupcake with the cut lines out of the basic shapes available layered on top of each other, so I didn't need to print anything or trace anything, just put the paper in the machine and let it do its magic! This cost me around $30-$35, but that is the cost of all the paper packs (closing down sale) and the pencils. I partially used 2 or 3 sheets from each pack, so the actual cost is much lower on a 'per pencil' basis.

To make these you will need:
-Scrapbook paper in a variety of colours/patterns/textures. My template fits 9 of the bases onto a mini square sheet and 6 of the large icing parts.
      Base Cut file for Scan'n'Cut
      Icing cut file for Scan'n'Cut
      Base image to print
      Icing image to print
-White card stock for the small inner icing parts
-Cute pencils or pens to put them on.
-Scan'n'cut machine (or you can print and trace to cut them out yourself)

1. Choose your papers!
2. Load the base and icing cut files onto a USB to use in your machine, or print and cut using the picture template. The image file hopefully can be used with other cutting machine software.


3. Arrange the shapes according to how many you want to cut on each paper. I always stick down the papers as I find the mat is just not always quite sticky enough, even then sometimes after the outline is cut a piece will still move and not cut quite right. It's a bit of trial and error with different papers.

4.Cut out you large icing backs using the regular size cut file. For the white smaller part, I reduced the size of one a couple of time until I was happy with it (about 10mm in the width option with the height/width ratio locked), again it is a bit trial and error here depending on how much writing space you want and how much colour from the back ground you want.


5. This is where the machine really earns its keep. Increase the number of icing clouds to meet your needs or fill up your paper. I cut 24 in one go and still had room for more!


6. Assembling these is quite easy. Choose a base and icing background to go with the white. Glue the white to the front and when dry enough, write your message. Give the top and bottom pieces a bit of a bend to put them into shape.


7.Stick the base to the top with enough over-lap to cover the top slot. Cut off any excess tape.


8.Put your pen or pencil in through the top and you are ready with a cute gift, and if you already have a scrap-booking stash or even used some recycled goods, all it cost you were the pencils!


Thursday, 9 January 2014

Window Shopping

I have been wandering around Aliexpress this morning looking for cheap thrills. Initially I was looking for a new bag. I have a lovely mint green Mimco thing, but I used it for all of 2013 and I'm a bit sick of it really. I don't want to spend much on another bag right now, and I know Aliexpress always has bargain items where the risk of it being really bad is not to much because the price is so low. I found heaps of other items that I would like...as usual. I usually stay away from direct copies or fakes trying to pretend they are the actual item, but there are a couple I would like to try just to see if they are even half decent- like most of the things I've bought there previously.

I am putting off buying anything for a little while. I don't need any of it desperately and I know that shipping takes quite a while so I figure the longer I put it off, the longer I keep my money and the higher the chance I decide I can't be bothered or it's not worth it. 
What are your favourite place to shop for bargains online? Which colour do you like best for the bags ( I really can't choose and there are even more colours I like too!)?

Wednesday, 1 January 2014

New Year's Eve 2013

Welcome into 2014! I hope you all had a wonderful evening, however you spent it. I went to a party at a roof top bar in Richmond and it was fantastic. I had so much fun and and a wonderful view of the fireworks without the crowds and hassle of being right in the city. I was even luckier to be driven home by a friend who got an amazing park just meters from the venue which the cherry on top for me!


I went for a mostly black and silver look with pink glitter nails and gold smokey eyes.


Eyelashes from Priceline; necklace, bracelet and clutch from Colette; gold eye shadows from Orglamix Cosmetics.
I spent most of the afternoon cleaning and a little baking to get the house in shape so we could at least START the year nice and clean. Evidently my vacuum is somewhat more powerful than I thought.
That would be my phone cord that got sucked right out of the plug!

After cleaning, but pre-pre-drinking, I made myself a nice little cocktail to have with some deliciously gooey baked brie. It had apple schnapps, cranberry juice and just a little bit of ginger-ale, most excellent.


We got home around 2am after a long wait at our local Maccas for a hangover preventing cheeseburger (or two...). This morning I woke up feeling pretty good, no hangover, just sleepy and hungry! I solved the latter issue by making some microwave poached eggs (once you try it you will never bother with a pan again!) on two very nice slices of home-made packet mix sour-dough rye bread with Vegemite. 2014 Em gave silent thanks to 2013 Em for her forethought in both cleaning and cooking all that time ago.
 Click here for the recipe!
Click here for the recipe!


The rest of the day has been spent pottering around inside thanks to the cozy weather, mostly playing with my newold laptop ( $150 second hand from gumtree- win).

I have lots of plans for lots of posts coming up, so I hope you come back soon :)