Showing posts with label download. Show all posts

Thursday, 23 January 2014

Cupcake Pencil Toppers with Downloads!

I've organised myself enough that this will be the first year I actually properly acknowledge the kids birthdays. I have always had the class sing the song etc, but I have never had anything to give them in the way of a card or special stickers like some teachers have.
I saw these pencil toppers on Pinterest, however the link didn't go anywhere which was a bit annoying.
I used the Scan n Cut online software to make the templates for the top and bottom of the cupcake with the cut lines out of the basic shapes available layered on top of each other, so I didn't need to print anything or trace anything, just put the paper in the machine and let it do its magic! This cost me around $30-$35, but that is the cost of all the paper packs (closing down sale) and the pencils. I partially used 2 or 3 sheets from each pack, so the actual cost is much lower on a 'per pencil' basis.

To make these you will need:
-Scrapbook paper in a variety of colours/patterns/textures. My template fits 9 of the bases onto a mini square sheet and 6 of the large icing parts.
      Base Cut file for Scan'n'Cut
      Icing cut file for Scan'n'Cut
      Base image to print
      Icing image to print
-White card stock for the small inner icing parts
-Cute pencils or pens to put them on.
-Scan'n'cut machine (or you can print and trace to cut them out yourself)

1. Choose your papers!
2. Load the base and icing cut files onto a USB to use in your machine, or print and cut using the picture template. The image file hopefully can be used with other cutting machine software.


3. Arrange the shapes according to how many you want to cut on each paper. I always stick down the papers as I find the mat is just not always quite sticky enough, even then sometimes after the outline is cut a piece will still move and not cut quite right. It's a bit of trial and error with different papers.

4.Cut out you large icing backs using the regular size cut file. For the white smaller part, I reduced the size of one a couple of time until I was happy with it (about 10mm in the width option with the height/width ratio locked), again it is a bit trial and error here depending on how much writing space you want and how much colour from the back ground you want.


5. This is where the machine really earns its keep. Increase the number of icing clouds to meet your needs or fill up your paper. I cut 24 in one go and still had room for more!


6. Assembling these is quite easy. Choose a base and icing background to go with the white. Glue the white to the front and when dry enough, write your message. Give the top and bottom pieces a bit of a bend to put them into shape.
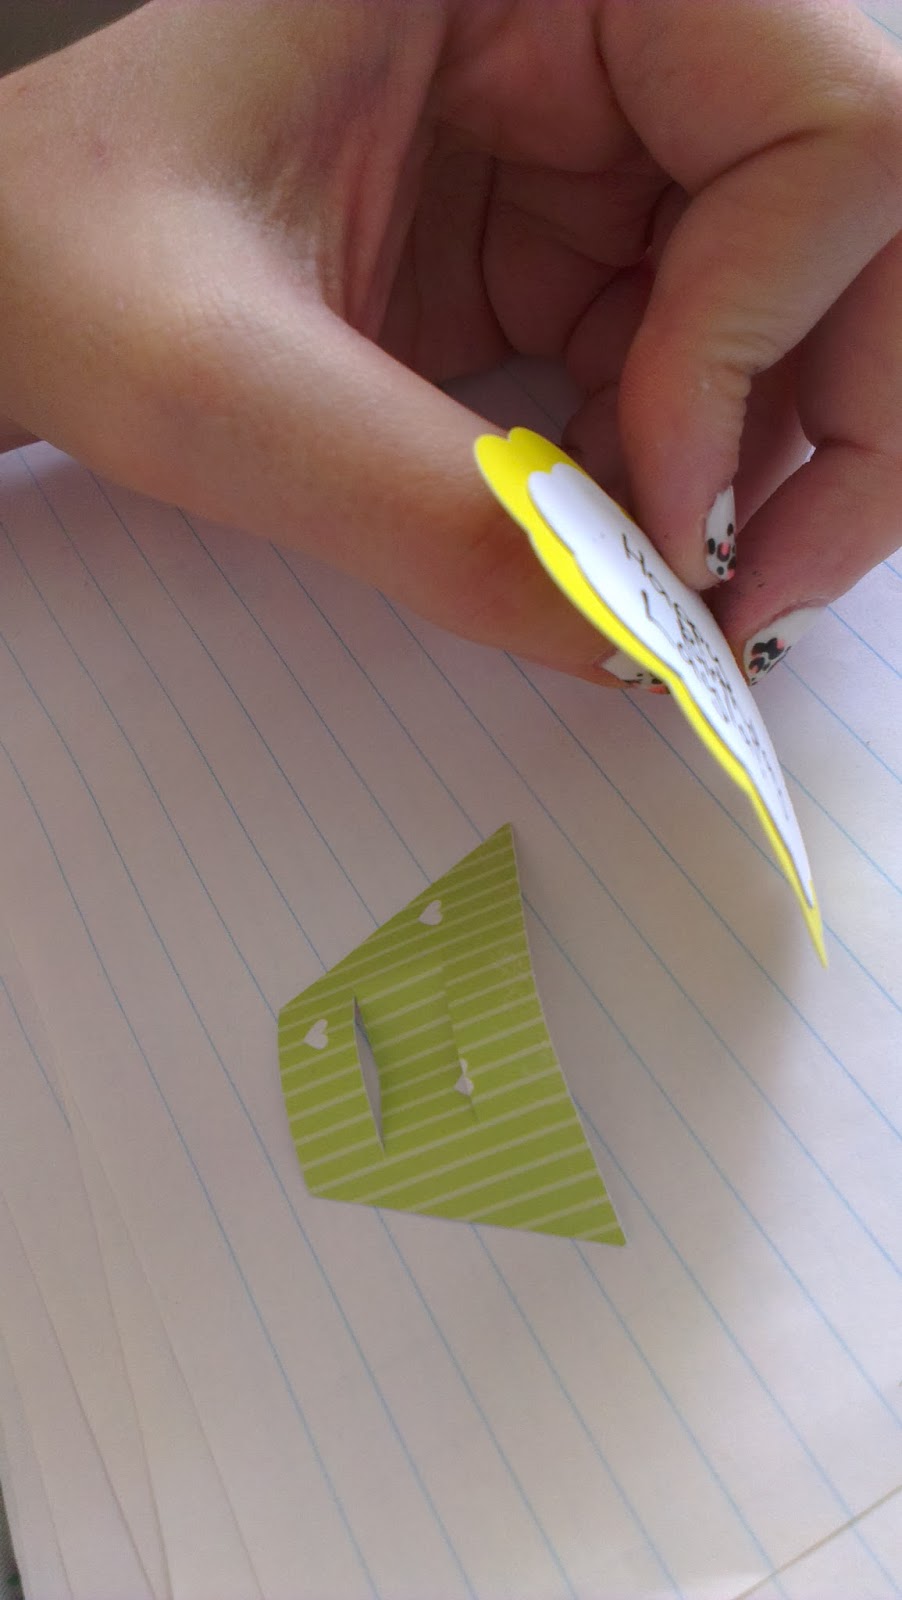


7.Stick the base to the top with enough over-lap to cover the top slot. Cut off any excess tape.


8.Put your pen or pencil in through the top and you are ready with a cute gift, and if you already have a scrap-booking stash or even used some recycled goods, all it cost you were the pencils!


Saturday, 4 January 2014

Moroccan Tile and Chevron Meal Planner Desktop + Downloads

This morning I was looking for an app or widget that I liked to use as a meal planner, previously I have been using my Google calendar but I wanted something prettier. I couldn't really find any basic, nice looking calendar widgets or apps that I liked so I made myself this background for my desktop that I can use with my desktop post-its as my weekly meal planner!

I used the program GIMP to create this, its basically a free Photoshop style program with lots of features that I don't know how to take advantage of. It is easy to use and get the hang of for basic projects and there are tutorials around for more complicated things.

All I did was create a new image the size of my screen (if you don't know you can find out here) and choose some pretty scrapbook papers to make the background and boxes. Then its just a matter of fiddling around with the placement and sizes until you are happy. I had to save a few versions with different placements to decide where I wanted it to sit on my desktop, but you can always just move the icons around to suit your placement.

Below are all the downloads and websites I used to create my desktop planner:

Digi-scrapbook papers- Mel Stampz
GIMP image editor
Font- Little Days (Cooltext.com)
Simple Sticky Notes
Screen Size 

If you like mine you can download it HERE!