Showing posts with label scrapbook. Show all posts

Thursday, 23 January 2014

Cupcake Pencil Toppers with Downloads!

I've organised myself enough that this will be the first year I actually properly acknowledge the kids birthdays. I have always had the class sing the song etc, but I have never had anything to give them in the way of a card or special stickers like some teachers have.
I saw these pencil toppers on Pinterest, however the link didn't go anywhere which was a bit annoying.
I used the Scan n Cut online software to make the templates for the top and bottom of the cupcake with the cut lines out of the basic shapes available layered on top of each other, so I didn't need to print anything or trace anything, just put the paper in the machine and let it do its magic! This cost me around $30-$35, but that is the cost of all the paper packs (closing down sale) and the pencils. I partially used 2 or 3 sheets from each pack, so the actual cost is much lower on a 'per pencil' basis.

To make these you will need:
-Scrapbook paper in a variety of colours/patterns/textures. My template fits 9 of the bases onto a mini square sheet and 6 of the large icing parts.
      Base Cut file for Scan'n'Cut
      Icing cut file for Scan'n'Cut
      Base image to print
      Icing image to print
-White card stock for the small inner icing parts
-Cute pencils or pens to put them on.
-Scan'n'cut machine (or you can print and trace to cut them out yourself)

1. Choose your papers!
2. Load the base and icing cut files onto a USB to use in your machine, or print and cut using the picture template. The image file hopefully can be used with other cutting machine software.


3. Arrange the shapes according to how many you want to cut on each paper. I always stick down the papers as I find the mat is just not always quite sticky enough, even then sometimes after the outline is cut a piece will still move and not cut quite right. It's a bit of trial and error with different papers.

4.Cut out you large icing backs using the regular size cut file. For the white smaller part, I reduced the size of one a couple of time until I was happy with it (about 10mm in the width option with the height/width ratio locked), again it is a bit trial and error here depending on how much writing space you want and how much colour from the back ground you want.


5. This is where the machine really earns its keep. Increase the number of icing clouds to meet your needs or fill up your paper. I cut 24 in one go and still had room for more!


6. Assembling these is quite easy. Choose a base and icing background to go with the white. Glue the white to the front and when dry enough, write your message. Give the top and bottom pieces a bit of a bend to put them into shape.
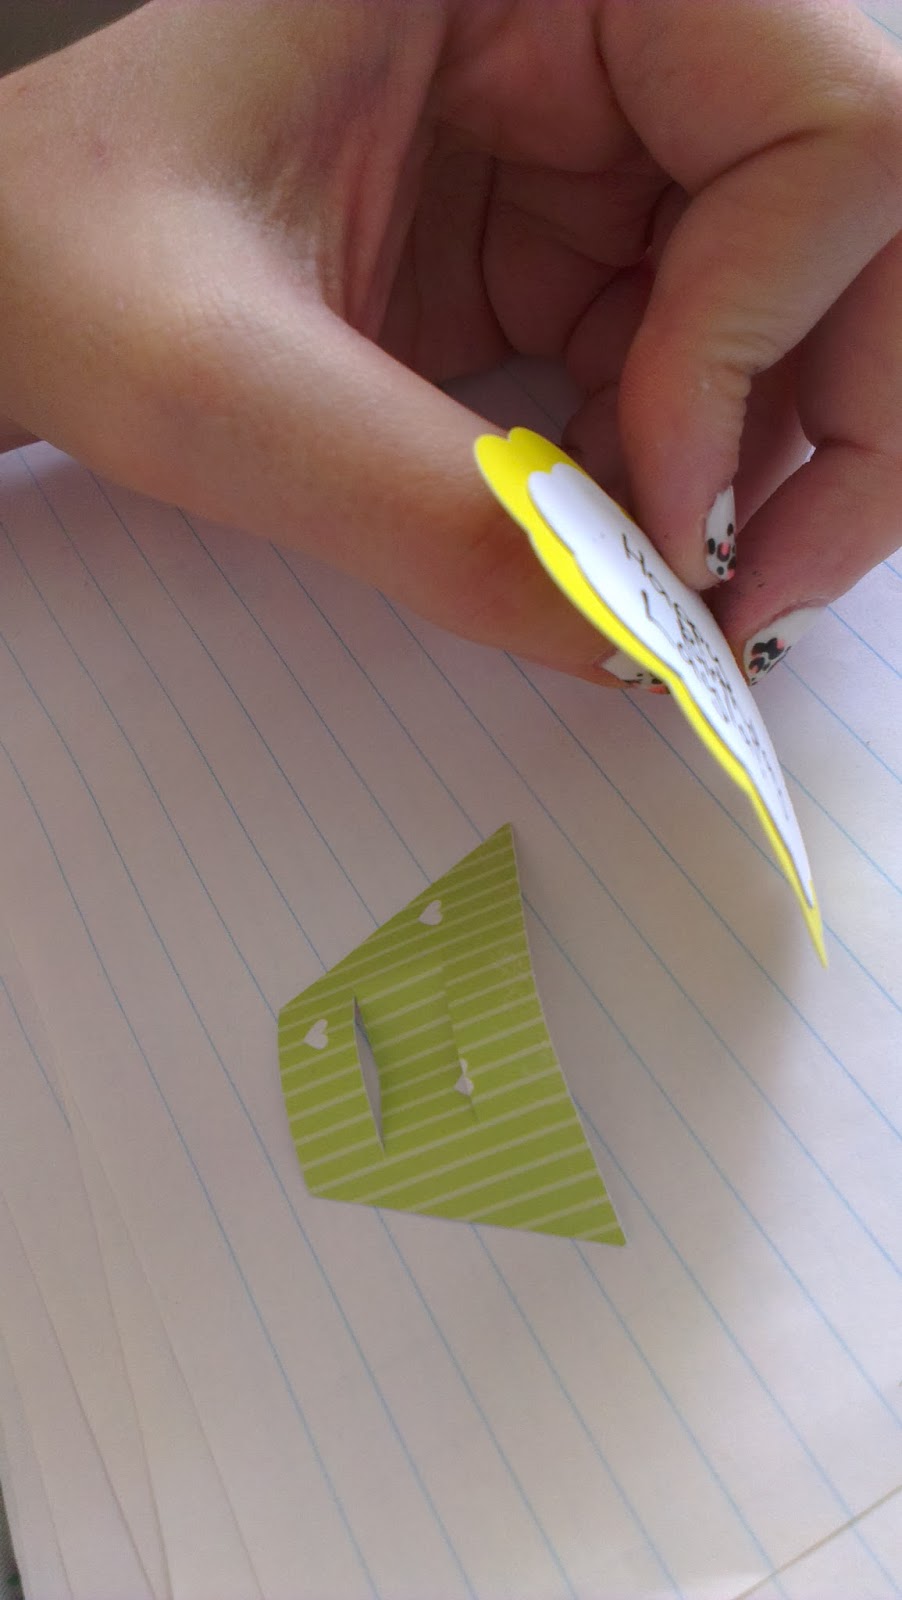


7.Stick the base to the top with enough over-lap to cover the top slot. Cut off any excess tape.


8.Put your pen or pencil in through the top and you are ready with a cute gift, and if you already have a scrap-booking stash or even used some recycled goods, all it cost you were the pencils!


Wednesday, 22 January 2014

Back to School Clothes and Stationary HAUL

So, what's more fun than actually doing the preparation I need to for the new school year? Shopping for it of course!
After some light shopping yesterday afternoon, I initially went out to my favourite shop outside Kmart, but for pretty much the first time ever, couldn't find anything I wanted to spend my gift voucher on. So I wanted into Kmart to look for school supplies and ended up getting heaps of cheap tops and basics.
After that I went to Target, another random cheapo kind of shop and a Kaisercraft shop.
Finally this evening I went to Officeworks, and aside from heading back to Kaisercraft tomorrow to get cute papers to make these (below) pencil toppers, I have no excuses to not start addressing what actually needs doing.

Clothes:
Yellow, longish, hi-lowish, lace embellished tank- Kmart- $12
Peach/apricot, longish, hi-lowish, lace embellished tank- Kmart- $12
Owl print, flowy tank with buttons- Kmart- $12
Floral print, flowy tank with buttons-Kmart-$12
Leopard Print round neck jumper-Kmart-$20
Purple/green layered work out top- Kmart-$12
Black/purple layered work out top- Kmart- $12
Basic singlets with shelf mint and turquoise, no shelf black- Kmart- $3 each
Basic tank top dusty coral and dusty magenta (not as bright as they show up here) $2 each
Floral embellished strap tank-Temt- $19.95
Basic tank tops black, nude-Temt- 6.95 These feel like a much more expensive material, its a synthetic blend and is like a slightly suedey microfiber 
Basic Singlet, nude-Temt 4.95 Same fabric as the tanks.


Navy/Cream Damask harem (ish?) pant- Caroline Morgan- $20
Navy stretch skinny pant with zip detail-  Target- $15

Stationary (and random make up)

Five drawer storage tub, blue- Officeworks- 16.96
3 pack binder display books- Officeworks- $2.99
Pick'n'mix bulldog clips and magets- Officeworks- $4.99
Purple wire mesh tray and bin- Officeworks- $5 each
White 2D ring binder- Officeworks- $3.83
Tropical bird print binder- Kmart- $2
Geoprint pastel wrapping paper- Kaisercraft- $1
My Day Chart calendar- Kikkik- $5
Monthly planner (to use as weekly timetable) Kikkik- $10
Lexar USB drive 8GB- Big W- $4.95
Maybelline Dream Pure BB cream, medium- Big W- $15.75
Maybelline Age Rewind under eye concealer-Big W- $~16 Annoyed at myself for these two, I realised this morning that I should have gone to Priceline and got 3 for 2. They are both good products though, so I'm not too bothered. 

All in all I think I got really good buys for pretty much everything and should get good use/wear out of it all, pretty pleased, but not excited at the prospect of putting it away and clearing out some old stuff that is getting replaced. But that's a problem for future Emily. 

Sunday, 12 January 2014

Mini Savory Tarts


Yesterday was the hen's night for one of my best friends from my cheer days. Instead of bringing gifts, everyone brought a dish to share and the recipe so she could make a scrapbook of them to keep. Such a cute idea and a way for everyone to give something meaningful and lasting. 
This particular recipe is great because it's so easily changed to suit whatever you like. I imagine it could even be made sweet with some vanilla in the cheese mix and something fruity on top!

Basic Tartlets (makes 48+ in mini quiche tins)
6 egg yolks
250gm Mascarpone cheese
1/3-1/2 block cream cheese
Salt
Pepper
Puff pastry


  1. Pre-heat oven to 200c, lightly grease mini muffin tins.
  2. In a bowl add egg yolks, mascarpone and chopped, soft cream cheese and whisk until smooth. Add salt and pepper to taste.
  3. Cut circles of puff pastry to fit muffin tins and press in.
  4. Add fillings and bake for 15-20 mins (or more) until golden.  Be careful of over-filling at the egg mix does expand a bit.

 Caramelized Onion Filling
1/4-1/3 block of butter
2-3tbsp sugar
4 onions, quartered and sliced
Cherry tomatoes, halved and de-seeded
Good quality pesto
  1.   Melt butter in a heavy based pan over medium heat.
  2.  Add chopped onions and stir to coat.
  3.  Maintain a medium heat and stir occasionally; you may like to drain excess oil at times.
  4.  When the onions have begun to turn golden brown add sugar, 1 tbsp at a time to help the process. Give each spoon several minutes to mix and cook down to avoid over sweetening.
  5.  Set aside in a bowl lined with paper towel to cool when golden brown and sweet to taste.
  6. Spoon onion mix into tartlets, top with cheese mix, pesto and tomatoes to garnish before baking.
Marinated Feta and Capsicum Filling


Yarra Valley Marinated feta, crumbled
Marinated roasted capsicum strips

  1. Spoon in cheese mix, top with capsicum and crumbled feta before baking.
     

Thursday, 9 January 2014

Fabric Lust

More web window shopping today... I'm being very lazy and trying to stay out of the sun because I got a very nasty burn down the front of both my legs when I was reading outside yesterday....

I know I'm not allowed to buy more fabric at this point. But there's no reason I can't look through all the sale fabrics at Hancock's and then arrange in rainbow order swatches.... so pretty! Seeing them all nicely arranged makes me want them even more, but like I said in the Window Shopping post, the postage takes a couple of weeks at best, so I can resist ordering knowing I won't get it right away or even soon.

Saturday, 4 January 2014

Moroccan Tile and Chevron Meal Planner Desktop + Downloads

This morning I was looking for an app or widget that I liked to use as a meal planner, previously I have been using my Google calendar but I wanted something prettier. I couldn't really find any basic, nice looking calendar widgets or apps that I liked so I made myself this background for my desktop that I can use with my desktop post-its as my weekly meal planner!

I used the program GIMP to create this, its basically a free Photoshop style program with lots of features that I don't know how to take advantage of. It is easy to use and get the hang of for basic projects and there are tutorials around for more complicated things.

All I did was create a new image the size of my screen (if you don't know you can find out here) and choose some pretty scrapbook papers to make the background and boxes. Then its just a matter of fiddling around with the placement and sizes until you are happy. I had to save a few versions with different placements to decide where I wanted it to sit on my desktop, but you can always just move the icons around to suit your placement.

Below are all the downloads and websites I used to create my desktop planner:

Digi-scrapbook papers- Mel Stampz
GIMP image editor
Font- Little Days (Cooltext.com)
Simple Sticky Notes
Screen Size 

If you like mine you can download it HERE!