Showing posts with label gifts. Show all posts

Thursday, 23 January 2014

Cupcake Pencil Toppers with Downloads!

I've organised myself enough that this will be the first year I actually properly acknowledge the kids birthdays. I have always had the class sing the song etc, but I have never had anything to give them in the way of a card or special stickers like some teachers have.
I saw these pencil toppers on Pinterest, however the link didn't go anywhere which was a bit annoying.
I used the Scan n Cut online software to make the templates for the top and bottom of the cupcake with the cut lines out of the basic shapes available layered on top of each other, so I didn't need to print anything or trace anything, just put the paper in the machine and let it do its magic! This cost me around $30-$35, but that is the cost of all the paper packs (closing down sale) and the pencils. I partially used 2 or 3 sheets from each pack, so the actual cost is much lower on a 'per pencil' basis.

To make these you will need:
-Scrapbook paper in a variety of colours/patterns/textures. My template fits 9 of the bases onto a mini square sheet and 6 of the large icing parts.
      Base Cut file for Scan'n'Cut
      Icing cut file for Scan'n'Cut
      Base image to print
      Icing image to print
-White card stock for the small inner icing parts
-Cute pencils or pens to put them on.
-Scan'n'cut machine (or you can print and trace to cut them out yourself)

1. Choose your papers!
2. Load the base and icing cut files onto a USB to use in your machine, or print and cut using the picture template. The image file hopefully can be used with other cutting machine software.


3. Arrange the shapes according to how many you want to cut on each paper. I always stick down the papers as I find the mat is just not always quite sticky enough, even then sometimes after the outline is cut a piece will still move and not cut quite right. It's a bit of trial and error with different papers.

4.Cut out you large icing backs using the regular size cut file. For the white smaller part, I reduced the size of one a couple of time until I was happy with it (about 10mm in the width option with the height/width ratio locked), again it is a bit trial and error here depending on how much writing space you want and how much colour from the back ground you want.


5. This is where the machine really earns its keep. Increase the number of icing clouds to meet your needs or fill up your paper. I cut 24 in one go and still had room for more!


6. Assembling these is quite easy. Choose a base and icing background to go with the white. Glue the white to the front and when dry enough, write your message. Give the top and bottom pieces a bit of a bend to put them into shape.
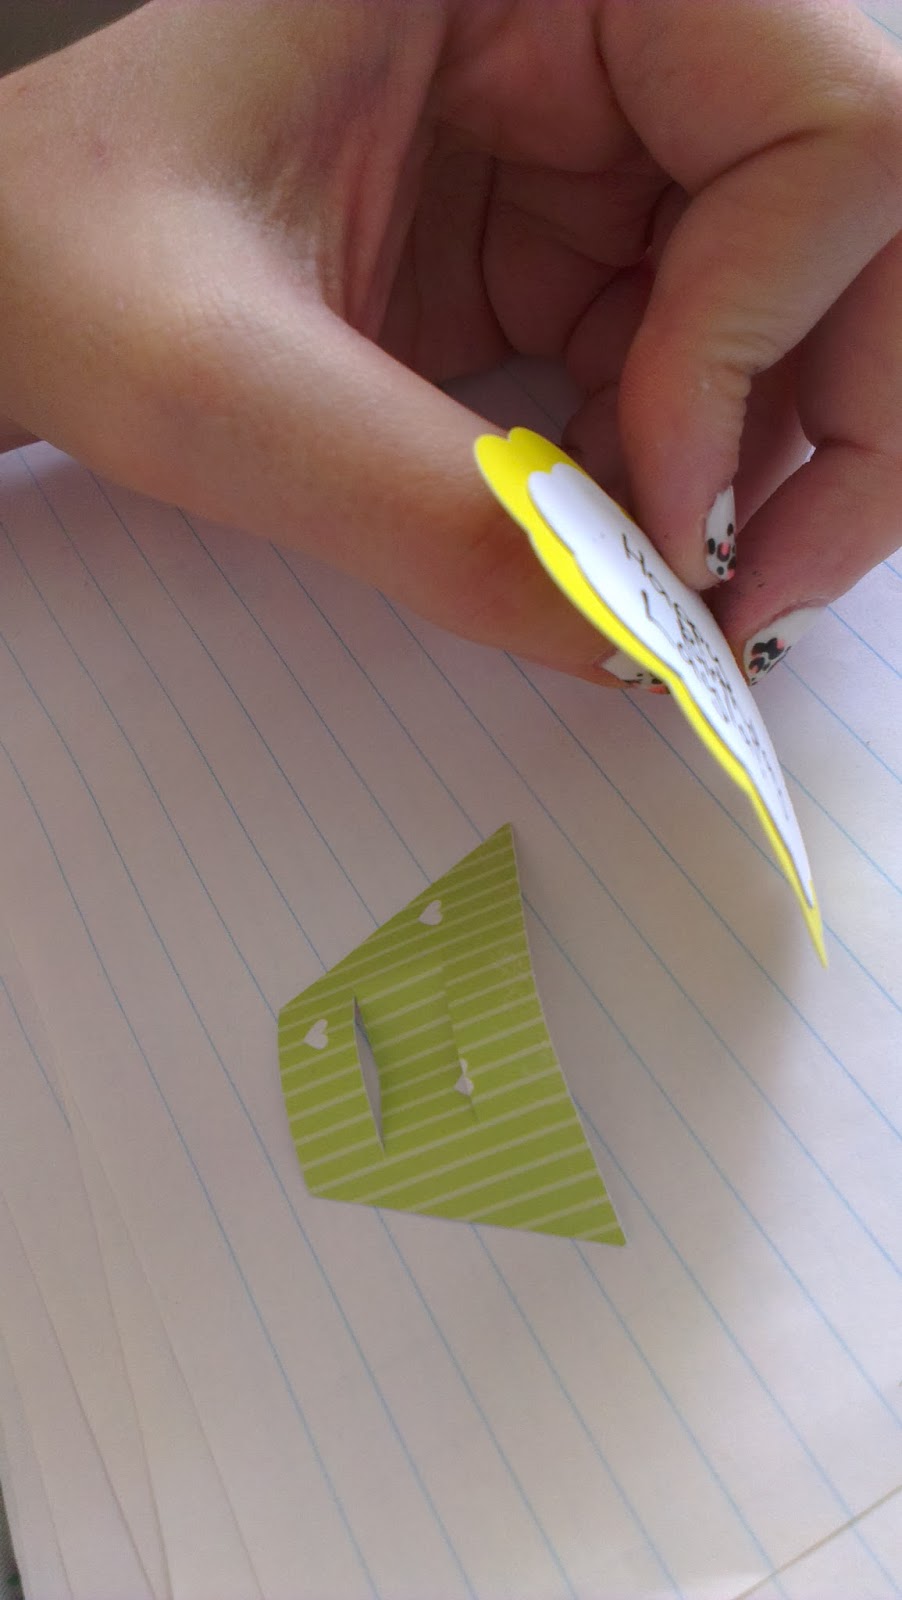


7.Stick the base to the top with enough over-lap to cover the top slot. Cut off any excess tape.


8.Put your pen or pencil in through the top and you are ready with a cute gift, and if you already have a scrap-booking stash or even used some recycled goods, all it cost you were the pencils!


Monday, 30 December 2013

Home Made Bread Machine Jam


I went to visit a friend in the afternoon yesterday, I left with a bag full of fresh and very ripe plums from her mother's tree, perfect for making jam! As I am a lazy and only part-time lady of leisure, I like to take shortcuts as much as possible to still get the fancy result. Enter the bread machine. I bought mine about 18 months ago in a sale and generally I use it to make pizza dough and jam. All I have to do is chop fruit (and with berries I sometimes don't even bother with that!), dump it in the machine and an hour and a half later... JAM! Sometimes the jam can be quite runny but it doesn't bother me as I generally eat it mixed in with plain yoghurt anyway.


I made three kinds of jam today, using up the plums and other fruit I already had in the fridge from Christmas or stored away in the freezer. The mango/strawberry came out a bit runny, I think I needed more pectin or more boiling time, I think maybe the fact that the mango went in frozen had an affect because the bread machine runs on a timer.  I actually made the blackberry/plum jam in the pressure cooker and that was quite good, didn't take long and easy to clean up compared to the stove because the pressure cooker pot is bigger than my other pots.

Cherryberry- Cherry and Raspberry Jam
700g Cherries (de-pitted- resulting in what looked like a violent murder contained entirely on my bench-top)
300g frozen raspberries
500g CSR Jam Sugar
500g castor sugar
10-15g pectin (Jamsetta)


Blumberry- blackberry and plum jam:
600g chopped plums
400g blackberries
10-15g pectin (Jamsetta)
1kg sugar

Manberry- mango and strawberry jam:
300g chopped strawberries
400g chopped mango
10-15g pectin (Jamsetta)
700g sugar

These gorgeous labels were made using the Jam Labelizer, a website entirely dedicated to creating cute jam labels using one of a few different templates and adding your own details or pictures. I highly recommend! I also used Skip To My Lou to make a recipe card for the lemonade scones.

I also bought some cute little jars, Kleerview jam jar plastic and ingredients to make lemonade scones to make up a little gift pack for another friend who has just moved out with her boyfriend.  (Please excuse the placement of these pictures, I'm new to this and don't know why they're all over the place...)


I think the finished product has turned out to be really cute! Pressure cooker seems to give good results in terms of thickness, however I think I will just go back to using the Jam Sugar by CSR rather than trying to work with pectin on its own, as it seems a bit tricky when using different types of fruit.
Let me know what your favourite recipe or combination for jam is!